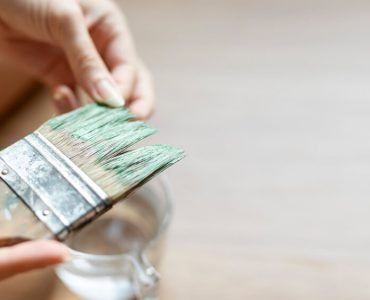
Keeping your nail polish collection pristine is essential for every nail enthusiast. As time goes by, nail polish bottles can accumulate grime and stains, affecting the quality of your lacquer and making it challenging to achieve flawless manicures. Fear not, for we have compiled a detailed step-by-step guide on how to clean nail polish bottles, providing the best ways to keep your favorite shades in top-notch shape.
Tools and Materials Needed:
Before diving into the cleaning process, gather the following tools and materials:
- Acetone or non-acetone nail polish remover
- Cotton balls or pads
- A small funnel (optional)
- Mild dish soap
- Warm water
- A clean cloth or paper towel
- A bowl or basin
- Rubber bands
Step-by-Step Guide to Cleaning Nail Polish Bottles

- Preparation
Ensure you are working in a well-ventilated area, as nail polish removers can emit strong fumes. Gather all the necessary tools and materials and lay down a clean cloth or paper towel to protect your work surface.
- Emptying the Nail Polish Bottle
If the nail polish bottle contains old, dried-up polish, the first step is to empty it to clean it thoroughly. Unscrew the cap and carefully pour the nail polish onto a paper towel or cotton pad. Be cautious not to spill the polish, as nail polish spills can be challenging to clean and may stain surfaces.
- Removing Residue from the Brush and Neck of the Bottle
Dip the brush into a small amount of nail polish remover or acetone. Swirl the brush around in the remover to dissolve any residue or old polish clinging to the bristles. Wipe the brush with a clean cotton ball or pad to remove excess polish. Repeat this process until the brush is entirely clean.
Next, clean the neck of the bottle with a cotton swab dipped in nail polish remover. The neck of the bottle is the area where the brush cap screws onto the bottle. Removing excess polish from this area will prevent the cap from sticking and ensure a smooth closure. - Cleaning the Nail Polish Bottle
Fill a bowl or basin with warm, soapy water using mild dish soap. Submerge the empty nail polish bottle into the soapy water and let it soak for a few minutes. This will help loosen any remaining nail polish or grime inside the bottle.
- Scrubbing the Bottle
After soaking, gently scrub the nail polish bottle’s inside using an old, soft-bristled toothbrush. Pay close attention to the corners and edges where residue accumulates. A cotton ball soaked in pure acetone or non-acetone nail polish remover can also be effective for stubborn nail polish stains.
- Rinsing and Drying the Bottle
Rinse the nail polish bottle thoroughly under running water to remove the soap and debris. Ensure no water droplets remain inside the bottle, as this can dilute the polish when you refill it.
Place the cleaned nail polish bottle upside-down on a clean cloth or paper towel to air dry. For quick drying, use a hairdryer in a relaxed setting, keeping the bottle upright to avoid mishaps. - Refilling the Nail Polish Bottle
Once completely dry the bottle, you can refill it with your desired nail polish color. You may use a small funnel to pour the polish into the bottle for easier refilling, preventing spills and waste.
- Proper Storage
To maintain the quality of your nail polish, proper storage is crucial. Store your nail polish bottles in cool, dark places, away from direct sunlight, as exposure to light and heat can cause the polish to thicken or change color.
Additionally, storing the bottles upright with a rubber band wrapped around the neck and cap can create a secure seal, preventing the cap from sticking to the bottle over time.
Quick tips to clean nail polish bottle:
- If you encounter a stuck nail polish bottle, immerse the cap in hot water for a few minutes to help loosen it.
- To revive old nail polish bottles that have become thick, use a nail polish thinner following the manufacturer’s instructions.
- If you spill nail polish on a surface, act quickly by blotting the excess with a damp cloth and wiping the area with rubbing alcohol or a mix of water and lemon juice to prevent staining.
- Be mindful of the expiration date of your nail polish, as old polish may not apply well and could potentially damage your nails.
Conclusion:
Cleaning and maintaining your nail polish bottles is a great way to preserve the quality of your favorite shades and extend their lifespan. By following our easy ways to clean nail polish bottles and incorporating proper storage practices, you can ensure your nail polish collection stays fresh and ready for beautiful manicures whenever you desire. Good luck, and enjoy your newly refreshed and sparkling nail polish bottles!


